CLICK HERE FOR FREE BLOGGER TEMPLATES, LINK BUTTONS AND MORE! »

Pages

Sunday, July 31, 2011

A Stair-Step Card at Last!

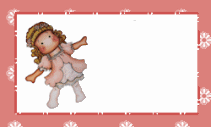
Well, it took a week longer than anticipated but I hope it was worth the wait! I had a ball making this card. It represents a lot of firsts for me in card making. A first "step" card, first "dirty" Tilda, first Pirate Tilda, first time painting a card, and first time using gauze.

To make Tilda look a little grubby I added brown tones to the shadows on her hat and the stripes on her shirt...as I look at it now, I might go back and add it to the boots as well!


The diecuts are all from Cricut Paper Doll, Accent Essentials, and Life's a Beach cartridges. I tried something new this time (another first!) by cutting everthing, except the flag & ship, in white Neenah Solar White and then colored everything with Copics. It is so much easier than running little scraps of colored cardstock through the unit and the small items are easy to color. I added Glossy Affects to the crab, starfish, shell, anchor, & fish eyes for some fun dimension and also to the back of the ship to make it a little less fragile.

The waves were cut using a Fisker border punch. Each row was antiqued a bit with white paint & stamp pad then slathered well with diamond Stickles. I chose to use alternating rows in different colors with waves facing opposite directions to give the card some movement. The shadow of the little pirate ship from Cricut Paper Dolls in the background gives the illusion of distance.

The gauze is a simple 2x2 bandage that I opened and stained with coffee to make a net for my shells. It was tied to the pier with string as was the anchor. The pier is a stamp by Art Impressions that I stamped on kraft cardstock and colored with Copics #E25, 29 and O. I cut it out and glued it beneath the first row of waves. Tilda was fussy cut also and pop-dotted to the pier to give a 3D affect.


I used the following Copics:
Flesh - E0000, E21, E50, R000, R20
Hair - C3, C5, N7, 0
Clothes - E40, 43, R22, R39, R46, B91, B95
Boots/hat - C1, C3, N7, E40, E43, E44
Earrings - YR21
Pier - E25, E29
Sun - Y00, Y15, Y17
Sealife - R22, R46, R17, Yoo, Y15, Y17, C1, C3
This photo is inspiration over at Magnolia-licous Challenge blog this time around. I love the colors and the geometrical shapes with a plain white background!

I'm entering this in the following challenges:
7/31 Magnolia Highlites - Summer Bash, Fishing fun
8/24 All That Scraps - #12 Hot, Hot Days of Summer
8/8 Magnolia-Licious #22 - Photo Inspiration

Saturday, July 23, 2011

Make a Side Step Card

Split Coast Stampers has a wonderful tutorial to make the side step card. Be sure to click the link and go there to get directions to make yours. It looks complicated but is so easy!

I've been dying to make one of these: CHECK BACK FOR MINE LATER THIS WEEKEND...but go ahead and get started on making yours.

Tuesday, July 19, 2011

All That Scraps Top 5 - Woohoo!!!


Wow if making Top 5 at All That Scraps isn't enough to light my fire and get me crafting, I don't know what will! Look out OWH...I feel a card-making marathon coming on.

I hope my swap partner at Magnolia Card Kits and Swaps Yahoo Group, Frances, sees her card made top honors. Frances received this card I crafted, with her in mind, through a recent swap on the group. Come check out our little group!

Monday, July 18, 2011

Copic Coupon Code at Michaels


I was scrolling through my Michaels Craft Store coupon selection a short time ago and was overjoyed to see a 40% off coupon for art pens & markers. The good news is my Michaels Store just began carrying the markers and hadn't put them on the shelf yet but a manager gave me a peek some weeks back so I knew exactly where to find them to have another look this time with 40% coupon in hand! Their price is steep at $6.99 each but at 40% off $4.19 is a bargain when one considers there is no shipping charge. So if you are inclined hurry over but first click my link and get your coupon! Oh, and you might want to print the chart above to take with you. Happy shopping Copic fans...I bought 9!!

If you're new...don't forget to follow my blog so you can come back for more fun tidbits like this deal!

Refilling Copic Markers

I'm really loving the Lily Pad! They have fun, easy projects for all levels of cardmakers and interesting how-to videos. Check out the latest on refilling Copic markers.

I have the booster nib and followed the directions judiciously and could not get a great fill with the amount suggested. The Lily Pad method does it quickly. I'll be filling mine this way from now on.

A word of caution...DO NOT forget to clean the nib after every use. I did and tinted my blender slightly!

It is CHA Chicago week so things will be quieter than usual around the blogs and websites. I'm hoping my favorite spot to buy Copics will learn a bit about customer service in their travels at CHA. When I find a suitable replacement...I'm outta there!

Friday, July 15, 2011

Magnolia Stamps of Sweden - Edwin's Fish


It has been years since I first saw this stamp and failed to buy it!! I have thought about and wanted to use it so many times since and am always annoyed that I let another summer go by without getting one so today I have decided to contact Diana at Magnolia-licious and order it! Just wait to see the next teepee card I make :-) Here's a photo from the official Magnolia website in Sweden.

The only bad thing I have noticed about this stamp is the fish all face the same direction. Otherwise, I think they are just the cutest...this coming from someone who HATES fish in either a tank or on my plate but I do love the sea and live fish swimming in their natural habitat.

If you have this stamp and would like to part with it...get in touch asap and maybe I'll buy yours instead of ordering new. Thanks for looking in today!

Wednesday, July 6, 2011

Teepee Card Tutorial

Hi cardmakers!!

Would you love to make your own teepee card? Well, go ahead and start by cutting 3 each 6" squares like this......

I had a blast making mine and was going to put together a little tutorial for you when I happened across this perfect one today. So no point in repeating things when you can just click this link and head to the Crafty Pad and follow theirs.

I can tell you a little about how I embellished mine though. Click the photo to bring up a larger copy to view for more details. This is mine flattened:

You'll see I added polka dot paper to the corners that are hidden under my shell print DP. These are small pieces I cut just to cover the exposed portion so not to waste paper. I believe they were 3" squares I cut diagonally. If you look an the enlarged photo you will see a small slit on the full polka-dotted triangle (next to the seahorse's back.) This is a simple perfect closure I copied from my Yahoo Group pal, Beth Babcock!

I'm terrible with flower embellishings and decided to add a aquariam/shaker box since my card is ocean-themed. The shaker round is a blister bubble from a trio pack of Prima rosebuds which I recycled, then filled with beachy colored seed beads and a diecut seahorse. I glued a backing of DP + CS which was slightly larger than the opening I cut in the card (used my circle Nestabilities). While the shaker dried, I cut a circle in the triangular section of the card. The finished/dry shaker piece was then glued into place on my triangular section of the teepee card. The outer ring surrounding the clear blister was cut using 2 Nestabilities dies that fit perfectly around. I glued punched circles in a darker green and added Glossy Affects to add dimension. This section still needed a little embellishing so I added a coordinating bow to finish off things.

TIP - don't try to use glitter in these. Static makes the glitter stick to the bubble and you can't see the innerds. I assembled 2 before I caught on that you couldn't see anything for the glitter sticking to the viewing area. You can see a small amount that I was unable to remove by clicking on the photo here-->

Next teepee card I make, I'm thinking of blunt cutting the pointy feet the card stands on since they seem to break down quickly. If anyone has a solution for this, please comment here. Thanks for stopping by my blog!!

Sunday, July 3, 2011

Maggie & Friend Teepee Card


The challenge over at Magnolia Card & Kit Swaps was to make a teepee card to share with a teammate. My teammate is Frances from Florida. I wanted to make her something that I thought any Florida-lover could enjoy and what better than an ocean theme? When I think Florida I think blue water and sandy beaches! I hope she enjoys the card and homemade box.

This box was so easy! It took all of 10 minutes including the stamping and diecuts. All you need do is measure the outer edges of your card, add width dimension x 2 + approx. 1/4" to length and width and score on those lines on all 4 sides. clip on the inner aspect of where the lines intersect on the two shortest sides. Folds on scoring and assemble 2 sides of the box, glue in place. Voila! Your done and ready to decorate.

Here are some additional challenges I'm pleased to enter my card:
1) Week #113 Just Magnolia & Hanglar Stanglar - Anything Goes w/optional Shabby Chic(closes July 7th)
2) Magnolia Stamp Lovers Challenge - Thinking of You Summer Flowers (ends July 16th)
3) All That Scraps - #11 Anything Goes (ending July 13th)
4) Creative Inspiration - Summer Vacation (ends July 9)