In celebration of the New Year I thought a look back at some of my favorite projects of the past would be fun. If you like what you see, please be sure to click on the left column to follow and visit me again in 2012!
Friday, December 30, 2011

Thursday, December 29, 2011
Enveloboxes!
Forgive me mother for it has been many days since my last post! Christmas came and went and we are on the horizon of a NEW YEAR so I thought I post this fun tidbit as one of my last posts of the year. If you hurry over to Tracy's blog, she is giving a lucky winner 25 of these wonderful creations on January 2nd.
Wowza! You have to run check them out: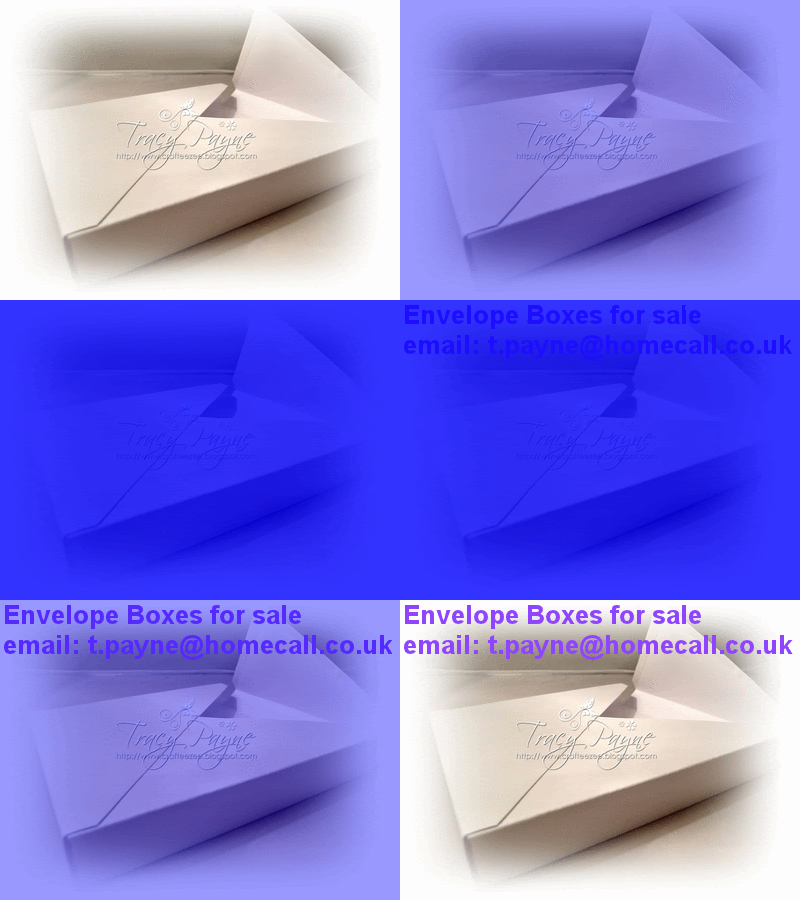
Wowza! You have to run check them out:
Tuesday, December 13, 2011
A Winterthur Christmas
Joy of joys!!!! There is no place like Winterthur for stepping back in time at Christmas. Last week, my pal Bonnie and I did just that...we had a fun morning touring this wonderful mansion which was home to the Henry Francis duPont family. The mansion and grounds are located in Greenville, Delaware which is truly the most beautiful place one would have ever been blessed enough to call home. I certainly did my share of dreaming that morning when Bonnie & I toured the mansion that had been decked in Christmas finery, we toured with just two other visitors. It was a real treat to have such a small intimate group with our knowledgeable docent, Ginny.
Here is the first thing I saw that caught my paper-crafting eye...
 Layers of creamy white paper cones, embellished with pearl dots along the edges make beautiful Christmas trees!
Here is the family's living room...ahhhh, and note the hand-painted Chinese wallpaper. Mr. duPont bull-nosed the ceiling edges to accommodate the wallpaper which arrived a little too long to fit the walls. It is an amazing result! Thank goodness for benefactors like this who have preserved our history. This place is worth a vacation to this area alone but write me if you do and I'll share more jewels you'll want to see when you come.

Tuesday, December 6, 2011
Tim's 12 Tags of Christmas
I happened across Tim Holtz wonderful blog of Christmas tags this morning and wanted to share a link so everyone can visit and marvel at his talent! Check out the blog by clicking HERE.
Here's a peek at my favorite tag by Tim...

Be sure to check out the video and complete tutorial on the blog too! I love all the "layers" of technique but am especially drawn to the crackling on the snowman. You'll love it!!
Here's a peek at my favorite tag by Tim...
Be sure to check out the video and complete tutorial on the blog too! I love all the "layers" of technique but am especially drawn to the crackling on the snowman. You'll love it!!
Wednesday, November 16, 2011
Sepia Tone Copic Tutorial
I happened across a most worthwhile post by a fellow Maggie lover and blogger, Penni. She has a wonderful video tutorial for coloring sepia tones with Copic markers that's worth a gander. Check out her video at http://lazycatscards.blogspot.com/2011/11/card-and-video.html or by clicking her name above. Then, send me a photo of your sepia-tone Maggie and I'll post it on my blog.
Keep eyes posted here to see my version soon...not sure I have all the E-Copics needed for her method but we'll see what I can do.
Keep eyes posted here to see my version soon...not sure I have all the E-Copics needed for her method but we'll see what I can do.
Friday, November 11, 2011
OWH Veterans Day Blog Hop and Hero Arts
The nice folks at Hero Arts are asking cardmakers to submit cards for OWH. As an incentive they are giving away an awesome prize of new stamps made in collaboration with OWH! If you'd like to join the fun check links in the post below or visitHero Arts blog or upload photos at Hero Arts Flickr Group by November 14th.
I LOVE, LOVE, LOVE Operation Write Home! Whenever I feel like I need to energize my creative batteries I sit down and make a few cards for them. I feel like it's my little way of giving back to those who sacrifice so much for us. Thank you, veterans everywhere...especially my uncles, friends, and father who passed away in 1987. Bless you all!!
Here's my card...

I LOVE, LOVE, LOVE Operation Write Home! Whenever I feel like I need to energize my creative batteries I sit down and make a few cards for them. I feel like it's my little way of giving back to those who sacrifice so much for us. Thank you, veterans everywhere...especially my uncles, friends, and father who passed away in 1987. Bless you all!!
Here's my card...

Wednesday, November 9, 2011
OWH Veterans Day Blog Hop 11-11-11

OWH is having a blog hop in honor of our veterans. Be sure to check it out this Friday! The hop features 11 of the biggies in papercrafting: Ranger, Prima, Basic Grey, Tombow, Tonic, Studio Calico, Hero Arts, Copic, Sizzix, SRM Stickers and May Arts. Sounds like lots of fun so go ahead and hop on over to the Stars and Stamps blog to begin.
Check out the fun and prizes!
Sunday, October 30, 2011
Lots of Good News

Our beautiful new little grandson arrived October 19th. Such a lucky little boy to have two wonderful parents. Congrats kids!
His artwork was finished just in time too. Daddy and I hung it while Mommy directed and baby looked on. It worked out perfectly with the beautiful mural in the room.
Take a peek...

 My cool ghoul Edwin made top honors at ABC Design Team's Challenge. Check it out and stop back for the new Christmas challenge that begins November 6th.
Thursday, October 27, 2011
Hero Arts Holiday Card Challenge


This fun was a simple card to make but looks so elegant! I'm looking forward to making more of these for this year's batch of special handmade Christmas cards.
Hero Arts challenged us to make a holiday card with a non-holiday stamp. I chose my Blossom Art set of clear stamps and used only the leaf to create this wonderful poinsettia flower. I stamped and heat embossed 7 petals in silver on white vellum and fussy cut. I found it easiest to glue the petals to a punched green Bazzill CS star with Glossy Accents. A punched hole made quick work of assembling the poinsettia with a yellow crystal brad center.
The background is layers of: recycled corrugated cardboard; cream cardstock which was stamped using MS sentiments in aqua & clear heat embossed, 2 faux crystals separate words; 4.125" green Bazzill cs; 4" Pink Paislee Butterfly Garden dp were pop-dotted for some fun dimension; and finished with a tie of aqua netting.
Be sure to check out the fun, upcoming Hero Arts Challenges and Hero Arts Flickr group.
Tuesday, October 18, 2011
New Snippet of Willabee's Art Project...


We're counting down the days now. Little Mr. A is due to make his debut on 10/22 but you know how those things go. Here's more of his triptych I created...this is part of the center panel. It's my own creation made of sewn layers of felt, fabric bonded to cardstock, with cardstock eyes, that have pupils on layers of chipboard that were coated with Glossy Accents. The feel were done the same.
At the 11'th hour I repainted the tree to make it match his room a little better. It is now more caramel and less red.
The ground of each panel is canvas sheets painted with acrylics. I hope he likes it!
Here's the completed middle panel...
 The photo was taken under the glass so forgive the glare!
Friday, October 14, 2011
Edwin's Halloween Treat Challenges
Hi fellow crafters and Tilda fans! Today, I'm posting a treat bag/box made of painted and distressed wood. I hope you enjoy.


I began with a wood handled shopping bag purchased from the craft store for $1 (I love bargains) which I painted with 2 coats pumpkiny caramel brown (sand lightly between coats), a fairly thick coat of Decoarts Weathered Wood crackling compound, then finally black acrylic paint and a spray coat of clear matte. I love the affect and almost didn't want to cover over it!
I used a handpunched round of glittery cardstock for the moon backdrop to my little Edwin vampire. I only have 2 Edwins and they are both Halloween stamps...my personal favs! The sentiment is a Stampendous cling stamp.
I used lots of Copic markers coloring Edwin in spite of his fairly simple coloration. The clothes, shoes, and hair used: C1, C3, C5, N7. For his deadly pallor I used: E000, E50, V000, RV000, RV02, V02. The jack-o-lantern used: Y04, Y07, YR21, G20, Y17, G82 and that's about it!
I'd like to enter my box in the following challenges:
Magnolia Down Under #117 Halloween, ends 10/14
ABC DT - Pumpkin Challenge (10/22)
(10/22)
Magnolia Stamp Lovers Fall Challenge (10/22)
Hooked on Crafts Anything But A Card (10/15)

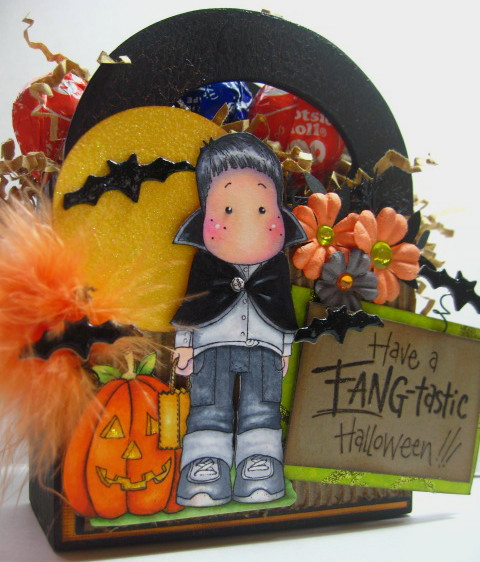
You can barely see the moon-colored cardstock, black & corrugated layers under all that goodness!

Glossy Accents were added to button & eyes.


Bats on curled wire are on chipboard base with a coat of black Stickles and Glossy Accents.

I used the masking technique on the jack-o-lantern!
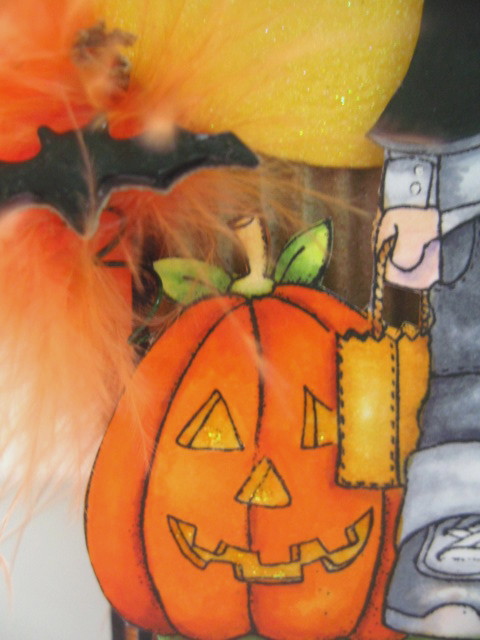

Check out that weathered wood treatment!
I used a handpunched round of glittery cardstock for the moon backdrop to my little Edwin vampire. I only have 2 Edwins and they are both Halloween stamps...my personal favs! The sentiment is a Stampendous cling stamp.
I used lots of Copic markers coloring Edwin in spite of his fairly simple coloration. The clothes, shoes, and hair used: C1, C3, C5, N7. For his deadly pallor I used: E000, E50, V000, RV000, RV02, V02. The jack-o-lantern used: Y04, Y07, YR21, G20, Y17, G82 and that's about it!
I'd like to enter my box in the following challenges:
ABC DT - Pumpkin Challenge (10/22)
(10/22)
Magnolia Stamp Lovers Fall Challenge (10/22)
Hooked on Crafts Anything But A Card (10/15)
7 Kids Kollege Fund Halloween (10/25)
Simon Says Halloween Challenge (10/18)
Wednesday, October 12, 2011
Another Sneak Peak...
With all the Tilda Christmas stamp hubbub, I've forgotten to post snippets of the tryptic I've been making for my new grandson who will be arriving any day now.
Here's a better close up of the leaves...thank you Cricut and Design Studio for the outer leaf. I used the Accent Essentials cartridge but made the leaf wider using Design Studio. The inner portion is fabric I cut to fit inside the leaf and backed with Stitch Witchery backed card stock. I lost count at 70+ leaves.


Here's a better close up of the leaves...thank you Cricut and Design Studio for the outer leaf. I used the Accent Essentials cartridge but made the leaf wider using Design Studio. The inner portion is fabric I cut to fit inside the leaf and backed with Stitch Witchery backed card stock. I lost count at 70+ leaves.


Here's the completed first 16" x 20" mixed media, canvas panel...

Subscribe to:
Posts (Atom)